Exercise 03: Auto Remediation
In this exercise, you will enable auto-remediation in Cloud Guard to automatically resolve issues with public Object Storage buckets. Building on the detector settings from the previous exercise, you will configure a responder recipe to change the visibility of public buckets to private automatically.
Objectives
- Add a responder recipe to the target.
- Enable auto-remediation to automatically resolve public bucket issues.
- Test the setup by creating a new bucket and setting its visibility to public,
- verifying that Cloud Guard automatically changes it to private.
Environment
Perform this exercise within the following environment:
- Compartment:
OCI-SEC-WS-LAB-nn - Region: Germany Central (Frankfurt)
- OCI Console URL: OCI Console Frankfurt - Login
- OCI User: lab-oci-sec-wsNN
- OCI Password: provided by trainer
Ensure you are in the correct compartment and region. New resources, such as Cloud Shell configurations and ADB access settings, should be created within your designated compartment.
Solution
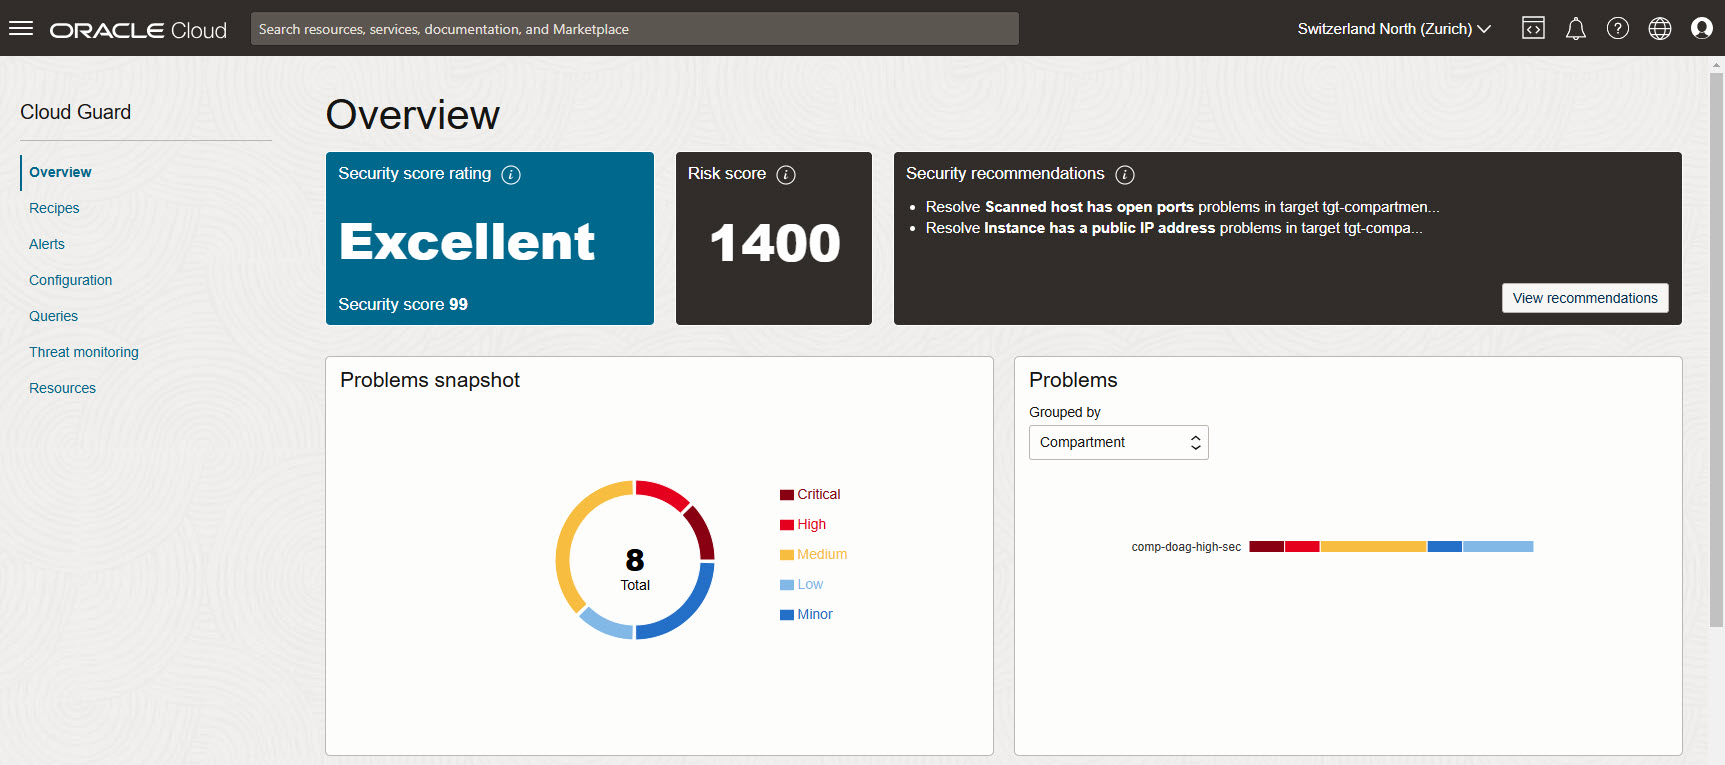
Login as User XYZ in OCI console and go to Cloud Guard Overview. Ensure you have select the proper compartment in from the dropdown list on left side.
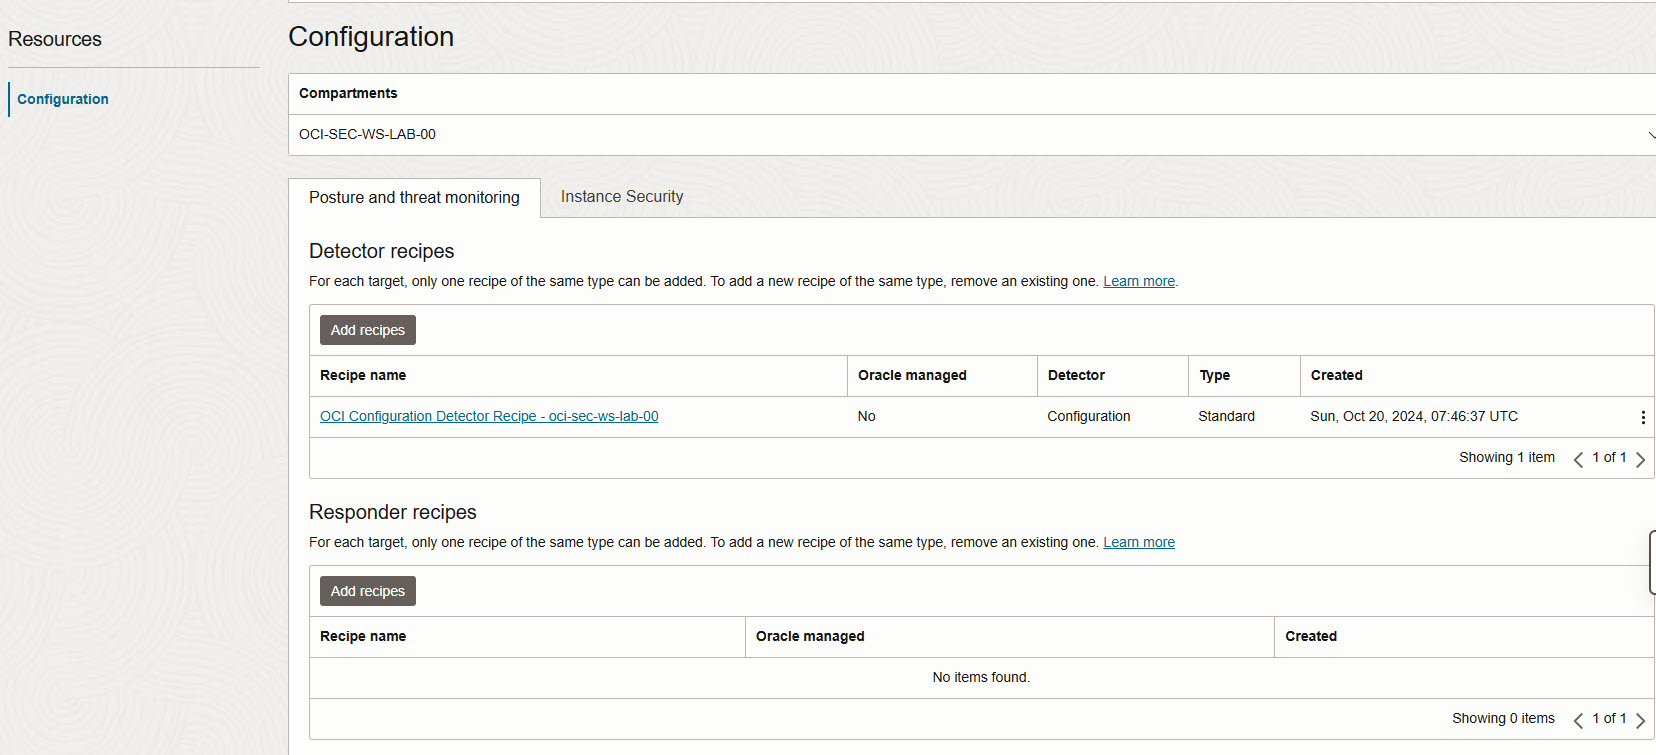
Enable Auto Resolve
Add Responder recipe to Target
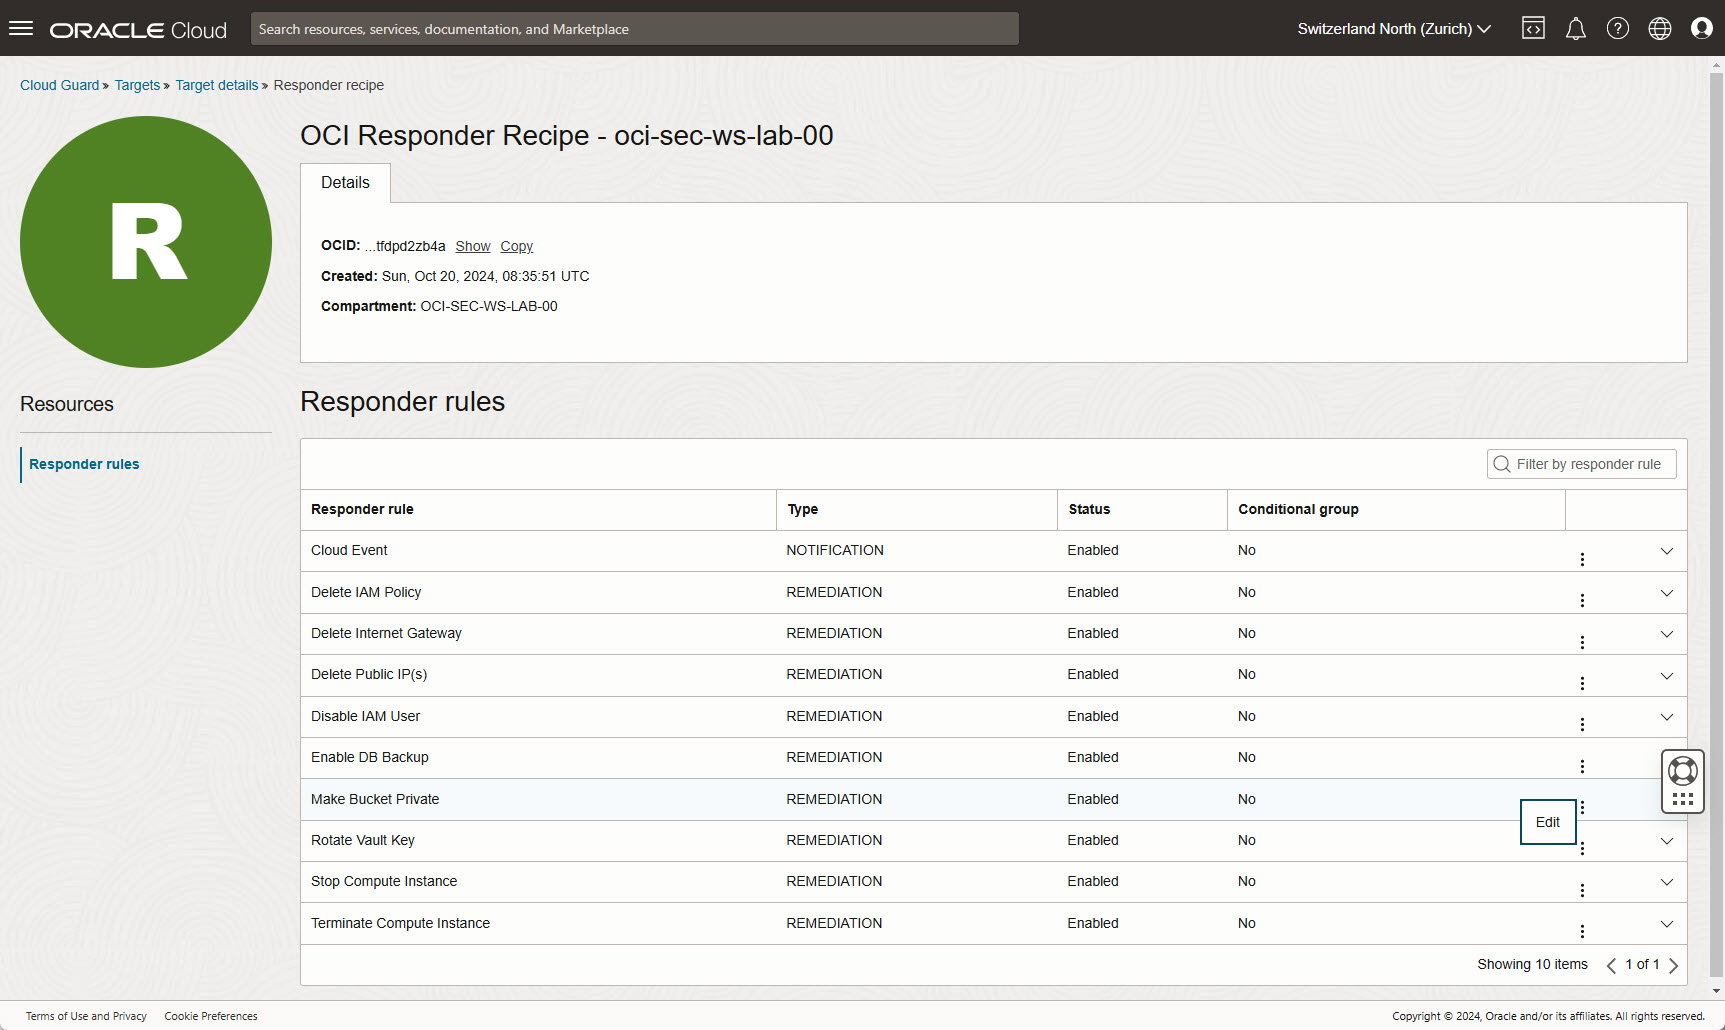
We must add the responder recipe to target configuration.
Identity & Security -> Cloud Guard -> Configuration -> Targets
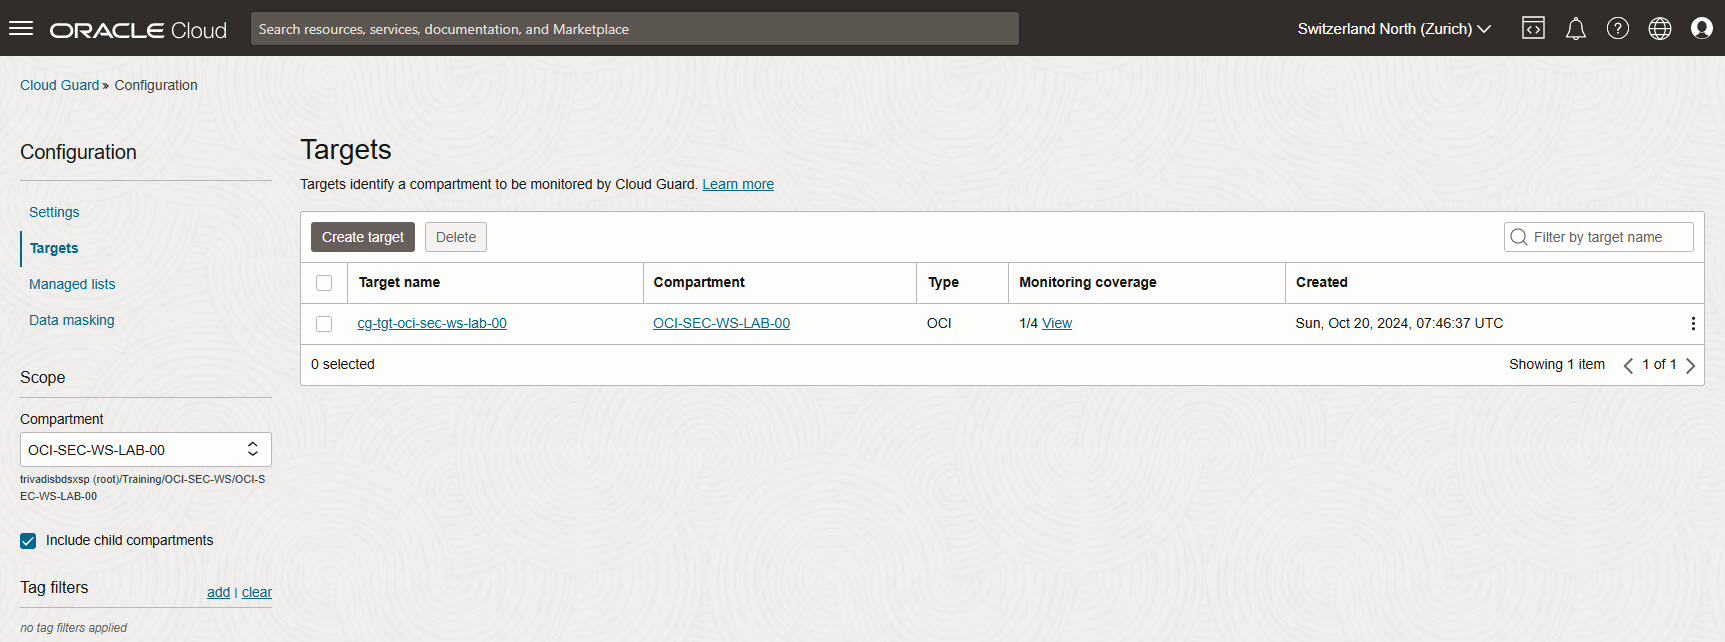
Select your created target an scroll at the bottom.
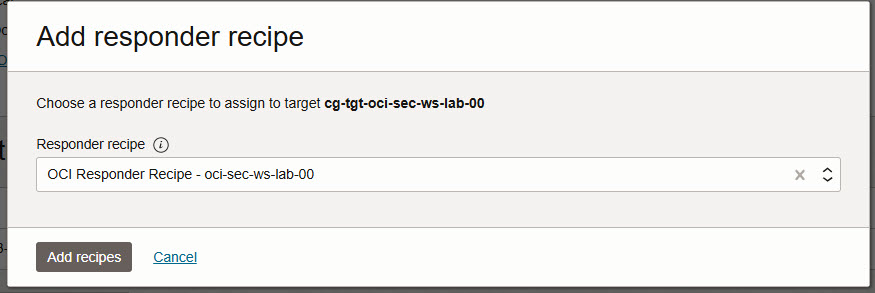
In section Configuration und Responder recipes, add recipe. Select your responder recipe from dropdown list and press Add recipes. Do not select the Oracle managed recipe as you have no privileges there to change any settings.
Enable Auto resolve
Select the fresh added Responder recipe. Edit the entry for Make Bucket Private by click on the three dots and Edit.
You can ignore the alert about privileges as these settings are done on top compartment level. We set condition
- In section Setting, activated Execute automatically.
- Enable checkbox to confirm the execution.
- Set Conditional Group for parameter region to eu-frankfurt-1
- Parameter: Region
- Operator: In
- List: Custom List
- Value: eu-frankfurt-1
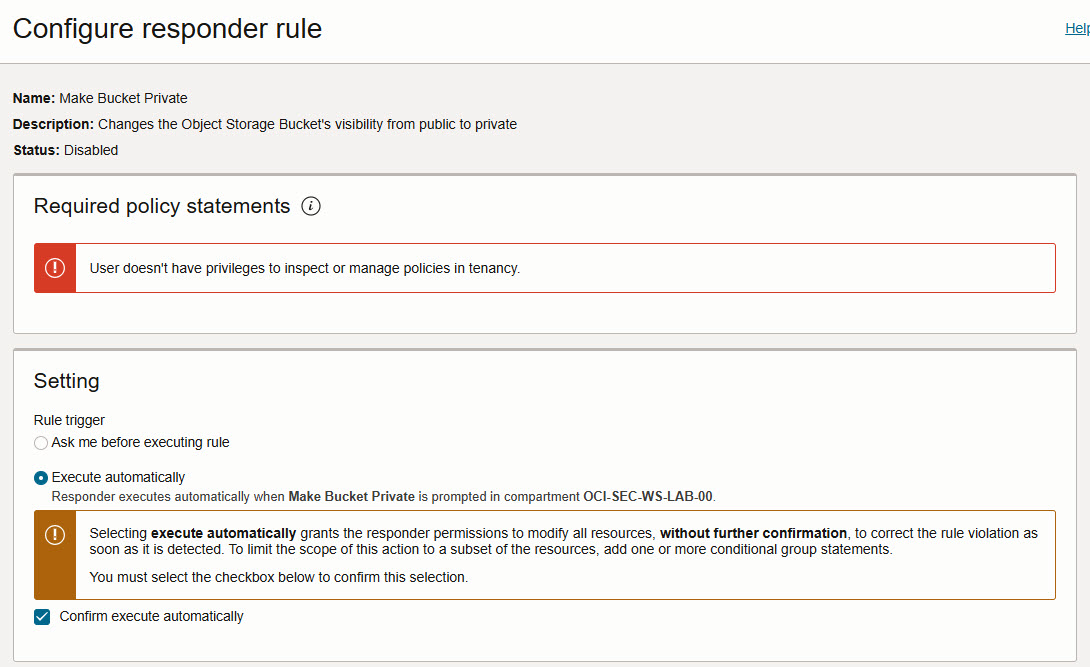

Press Save at the bottom.
Verify Auto-Resolve by Creating a Public Bucket
Repeat the steps from the previous lab to create a new bucket.
Create Bucket
Add basic information and description. Call it private_bucket. Ensure you are in the correct compartment. If not, select your compartment in left side dropdown menu.
Go to Storage -> Object Storage & Archive Storage -> Create Bucket.
- Set Bucket Name to private-bucket and let other settings as per default.
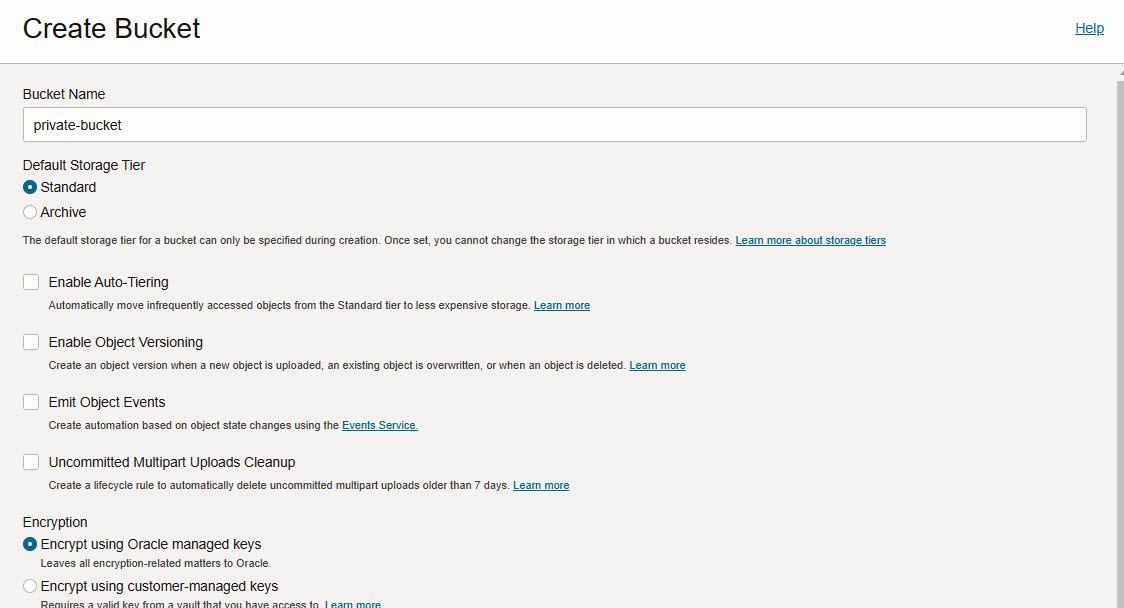
Press Create at the bottom.
Edit Visibility
Edit created bucket from above by click on the three dots on bucket line -> Edit Visibility. Change it to public.
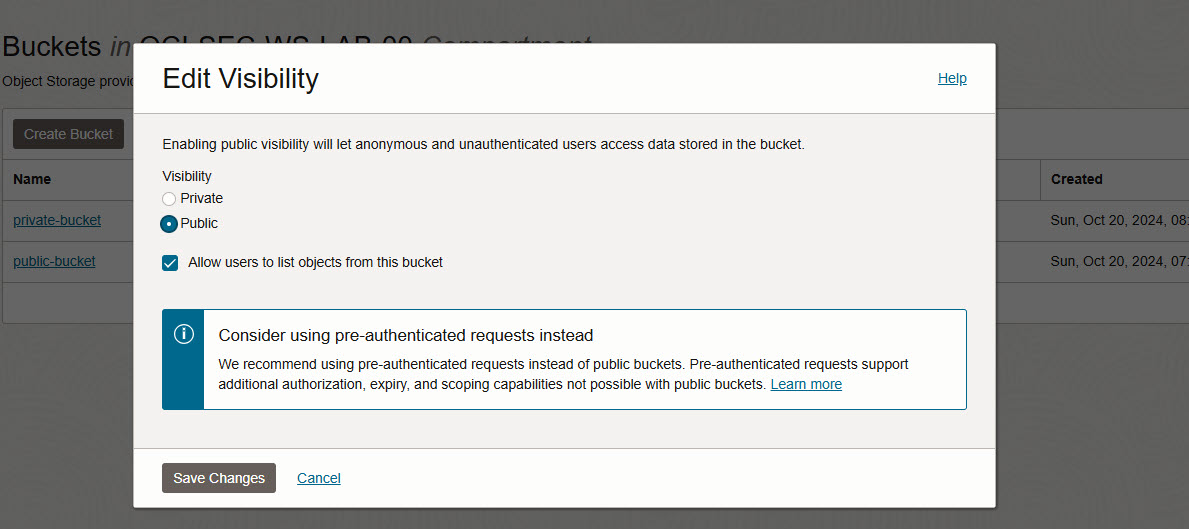
Press Save Changes at the bottom.
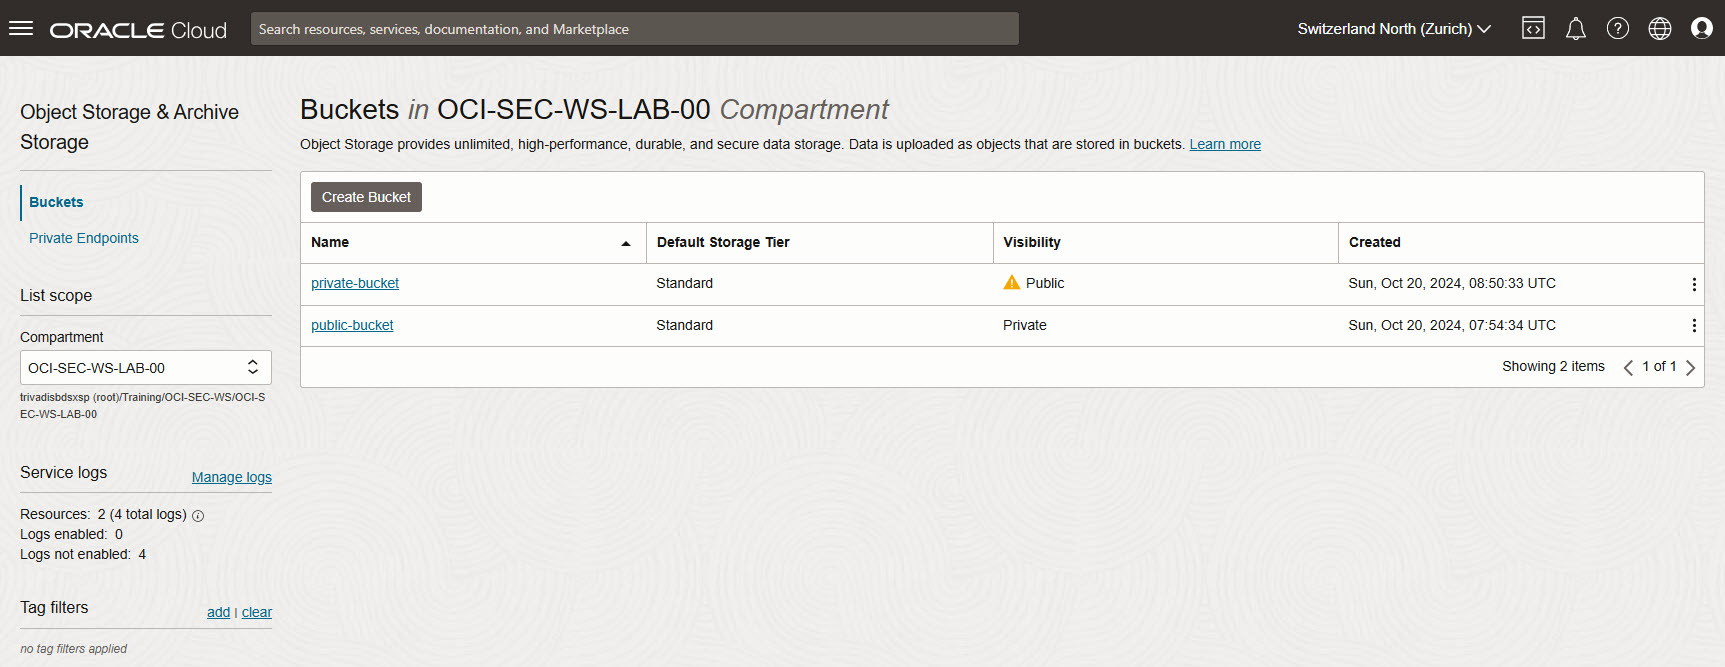
Verification
The bucket is set to public and marked by a yellow triangle.
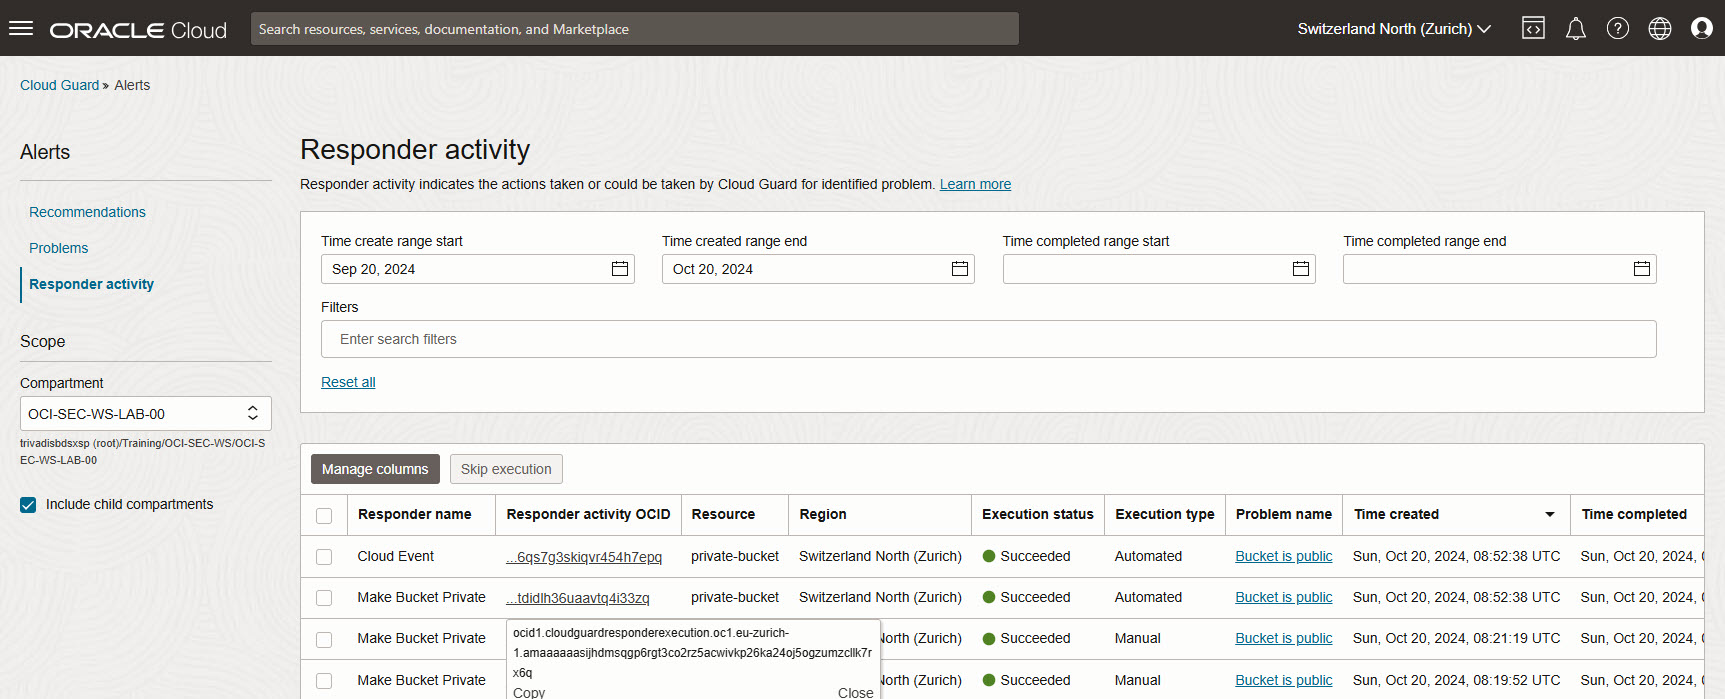
Verify Auto Resolving
After a couple of seconds, you can verify the Responder activity. There are two new entries to make the bucket private.
Identity & Security -> Cloud Guard -> Alerts -> Responder activity
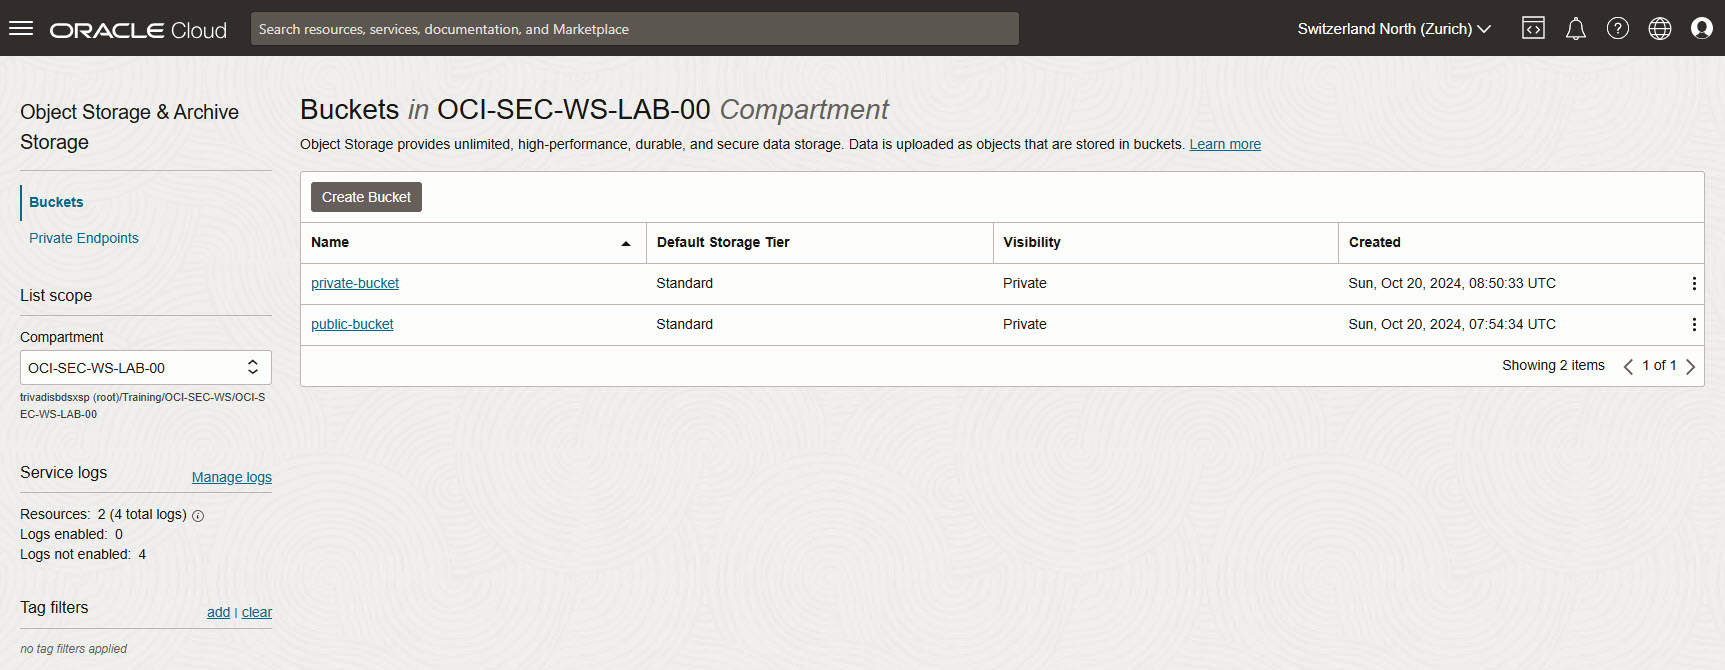
Verification
The visibility for your Object Storage bucket has automatically changed now to Private.
Storage -> Object Storage -> Buckets
Summary
In this exercise, you:
- Added a responder recipe to your Cloud Guard target.
- Enabled auto-remediation to handle public bucket visibility issues.
- Tested auto-remediation by creating a public bucket and verifying that Cloud Guard automatically set it to private.
You are now ready to continue with the next exercise, where you will configure Cloud Guard notifications for security alerts.
- Previous Exercise: Exercise 02: Manual Remediation
- Next Exercise: Exercise 04: Notification Setup